
Introduction
Yoga for belly fat reduction
Of all the fat that is accumulated in your body, belly fat is most stubborn to shed. Let us resort to the Yoga, the ancient Indian practice, that focuses on exercise, diet, breathing, relaxation, and meditation, for healthier living. There are numerous yoga asanas that aid in your endeavor to shed your belly fat. Let’s look at these asanas one by one and get to know how to work them to get a flat belly.
1. Tarasana:
Tarasana, also known as Tadasana, is the palm tree pose that requires you to stand straight like the palm tree. Popular yoga postures such as handstand, headstand, and full inversions are all part of this asana. This warm-up pose helps improve your blood circulation and readies your body for the asanas to come.
How to do:
– Stand straight with your feet together and hands to your sides.
– Stretch your arms up while keeping them parallel to each other and palms facing inwards.
– Raise your heel slowly and allow yourself to stand on your toes. Hold the position for at least 10 seconds.
– Come back by bringing your heels down first and slowly get yourself back to your initial position.
Limitations: This asana is not apt for you if you suffer from vertigo.
2. Konasana 2:

Konasana is the angle pose that has 2 variants. This asana is practiced to promote the health of your internal organs. To facilitate the burning of belly fat the second variant of this asana is practiced. In addition to reducing your waistline, this asana also improves your digestion, blood circulation, and nervous system stimulation.
How to do:
– Stand straight with your hands to your sides and legs parallel to each other. Look ahead and have your chin drawn in.
– Breathe in and bend your upper body to the right, above the waist.
– Ensure that your hips and legs stay still while you keep your left arm close to your head.
– Ensure that your head, neck, and chest, are perpendicular to your base.
– The above-listed steps must be completed within 3 seconds while inhaling and hold the position for at least 6 seconds.
Yoga for weight loss/ yoga exercises to reduce hip and thigh fat
Introduction
Yoga for hip and thigh fat
Yoga is one of the natural ways by which you can reduce your overall weight. The areas that usually pose to be challenging in your weight loss journey are the hip and thighs. The hours spent in the gym and the stringent diet restrictions all seem to be in vain when trying to burn thigh fat. If you have run out of all other options to burn hip and thigh fat, we recommend that you try yoga. Let us look at some proven asanas that can help you shed the stubborn hip and thighs fat.
1. Mandukasana:
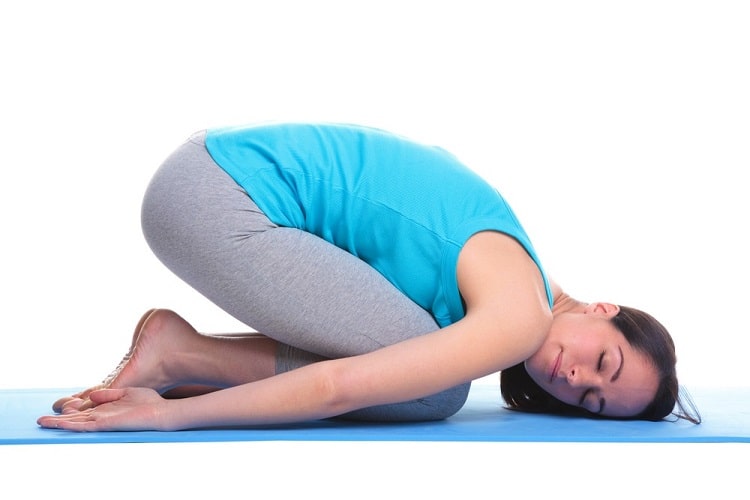
Mandukasana, also known as the frog posture, is practiced to get rid of abdominal gas issues as well as burning your hip and thighs fat.
How to do:
• Begin by sitting in vajrasana pose.
• Round your fists while keeping both your thumbs inside and press your navel area with your rounded fists.
• While exhaling, bend forward slowly to get your chest to rest on your thighs.
• Ensure that your head and neck are up gazing forward and hold this position for at least 10 seconds.
• You can get back to your initial position by bringing your chest up from your thigh.
Limitation: If you are suffering from spine issues, slipped disc, or lumber spondylitis, do not attempt this asana.
2. Shalabhasana:

Shalabhasana, also known as the locust pose is practiced to reduce fat accumulated around your waist, knee, thighs, and abdomen. Some of the asana benefits include improved blood circulation and flexibility.
How to do:
• Lie on your stomach with your back facing up.
• Ensure that your legs and heels are together with your hands at your sides (palms facing the ground and placed under your thighs).
• Your chest and forehead touch the ground.
• Now, raise your chin to place it on the floor.
• While inhaling, lift both your legs as high as you can backward. Continue to keep your palms pressed on the ground.
• Hold this position for a few seconds and slowly bring your legs down to the ground to come back to your initial position.
Limitation: If you are suffering from the following conditions, refrain from practicing this asana –
• Asthma
• Hypertension
• Intestinal tuberculosis
• Peptic ulcers
• Heart disease
• Weak lungs.
3. Halasana:
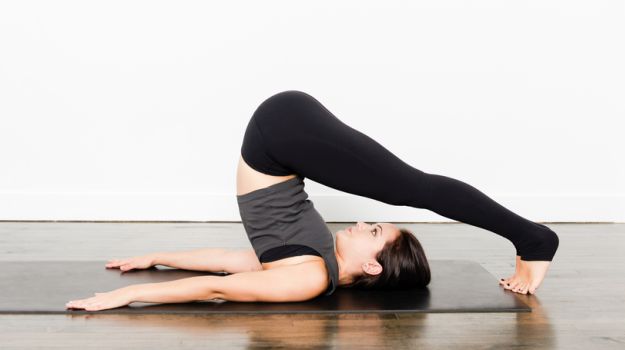
Halasana, also known as the plough pose, is practiced to eliminate issues such as dyspepsia and constipation. It is a great exercise for strengthening your back and improving flexibility. It is suggested to children who have difficulty growing tall as per their age.
How to do:
• Lie on your back with your legs together and arms to your side.
• Now, slowing raise your legs carefully to chart angles up to 30o, 60o, and eventually 90o while your legs stay straight and vertical.
• Now, lift your truck while lowering your legs further across your head until it touches the ground.
• Hold this position for at least 5 to 10 seconds while keeping your arms pressed on the ground.
• To release, remove your arms, lower your torso, get your legs to 90o bringing yourself to your initial position.
Limitation: If you are suffering from slipped disc, hernia, hypertension, stiff spine or cervical spondylitis, do not attempt this asana.
4. Parsvakonasana:
/extendedsideangle-5c5b575e46e0fb0001849b63.jpg)
Parsvakonasana is the extended side angle pose that allows you to stretch your body right from your heel to your fingertips. This asana is found to be effective in helping with issues such as constipation, menstrual discomfort, infertility, sciatica, osteoporosis, and lower back pain.
How to do:
• First, stand in the mountain pose and with an exhale move one foot away from the other to get a 3 feet gap.
• Turn your right foot out but ensure both your heels are aligned.
• Bend your right knee to get a right angle between your thigh and ankle.
• Simultaneously, lower the right hand and touch the floor with your palm.
• Now, stretch the left hand upwards as straight as you can and look at the fingers of your stretched-out hand.
• Hold this position for at least 10 seconds.
• Repeat the same steps with your left side.
Limitation: If you suffer from sciatica, blood pressure variation, headache, and insomnia, do not attempt this asana.
5. Supta Padangusthasana:

Supta Padangusthasana, also known as reclining big toe pose, is practiced to relieve lower back pain and arthritis pain. This asana provides a great stretch to your hamstrings, calves, and thighs while strengthening your back.
How to do:
• Lie on your back with your legs extended.
• Now, bend your right knee and pull your right thigh to your torso.
• Once pulled, hug your torso to your belly and loop a strap in the cup of the foot.
• Extend the right heel up to the ceiling and press your shoulder blades while pressing it to the floor.
• Flex the extended foot by trying to point the great toe of that foot.
• Hold the leg up for at least 10 seconds and repeat the same with the other leg.
Limitation: If you are suffering from hamstring or shoulder injury do not try this asana. Pregnant women must also keep themselves from practicing this asana.
6. Ushtrasana:

Ushtrasana, also known as the camel pose, is known to yield great results in people suffering from a hunched back. It helps in regulating the endocrine system and also helps with better digestion in addition to enhancing your flexibility.
How to do:
• Begin by sitting in vajrasana pose.
• Slowly stand on your knees while your toes are pointing back.
• Bend your spine backward and hold your heels with the palms of your hands.
• Bend your head backward and hold the position for at least 10 seconds.
• To release, take your hands off your heels, bring your head, and rest of the body back to the vajrasana pose.
Limitation: If you are suffering from vertigo, hernia, arthritis, or abdominal issues, refrain from practicing this asana.
7. Vyaghrasana:

Vyaghrasana, also known as the tiger pose, is effective in strengthening your arms, knees, and thighs in addition to improving your blood circulation. It is recommended, especially for its effectiveness in burning fat in the hip and thighs.
How to do:
• Begin by assuming the cat stretch pose.
• Now, slowly raise your right foot while maintaining the bent knee. Bring your foot as close as possible to the back of your head.
• Raise your head to look straight forward.
• Hold this position for at least 10 seconds, and slowly bring the right leg down under your hip and toward your nose.
• Now, press the thigh to your chest and hold this position for at least 10 seconds.
• Repeat the same with the left leg.
Limitation: If you are suffering from pain in your hip, thigh, leg, neck, back, or joints, do not attempt this asana. Also, if you have spine issues, slipped disc, knee problem, or weak wrist, refrain from practicing this asana.
8. Parivrtta Trikonasana:
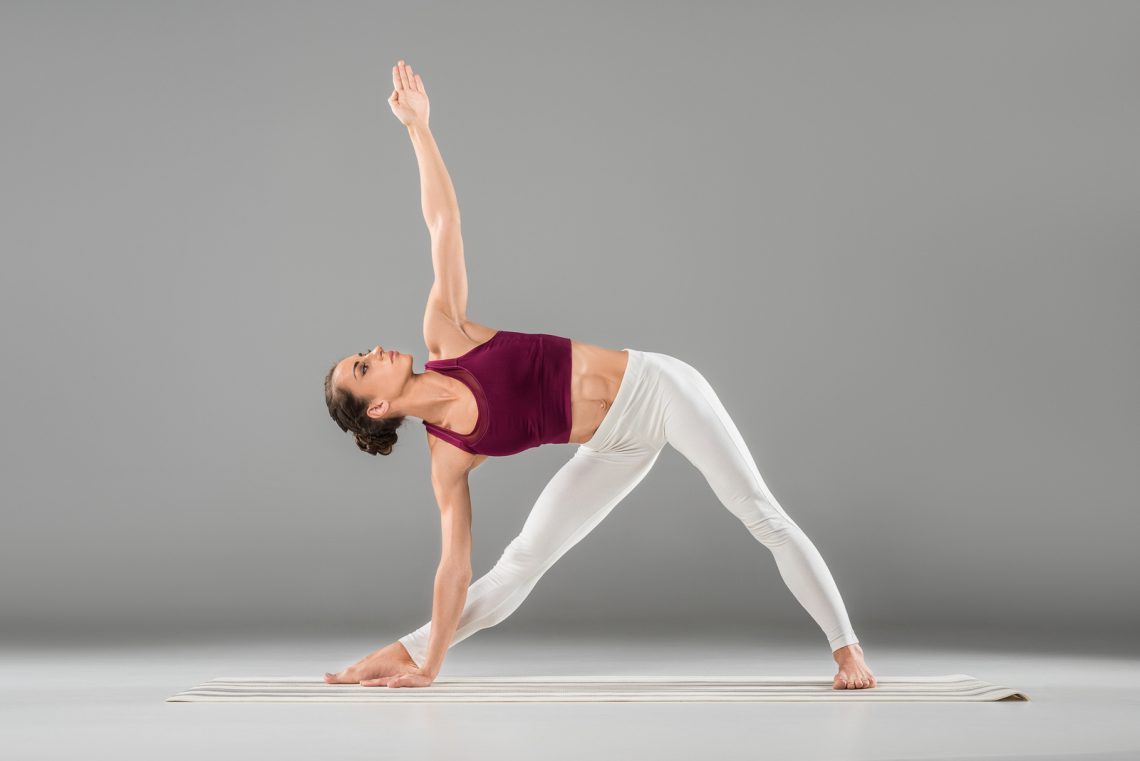
Parivrtta Trikonasana, also known as the revolved triangle pose, helps you deal with stiffness in your back and relieves back pain. It also helps regulate digestion and rids you of constipation.
How to do:
• Start by standing in tadasana pose and move your feet apart to accommodate a gap of 3 feet between them.
• Raise your arms to shoulder level with your palms facing down.
• Turn your left foot to an angle of 30o and your right foot to an angle of 90o but ensure that both your heels are in alignment.
• Bend your right thigh forward to align the right knee and ankle.
• Now, turn your torso to the right and bring your left hand to touch the floor.
• Hold this position for at least 10 seconds and repeat the same with the other side.
Limitation: If you are suffering from low blood pressure, diarrhea, headache/migraine, or insomnia, do not attempt this asana.
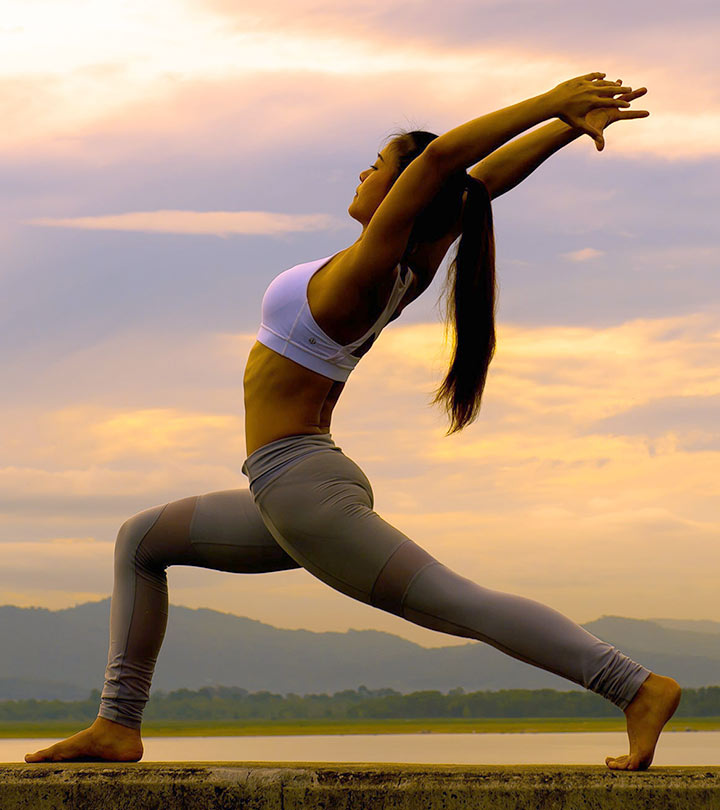
9. Virabhadrasana 1:
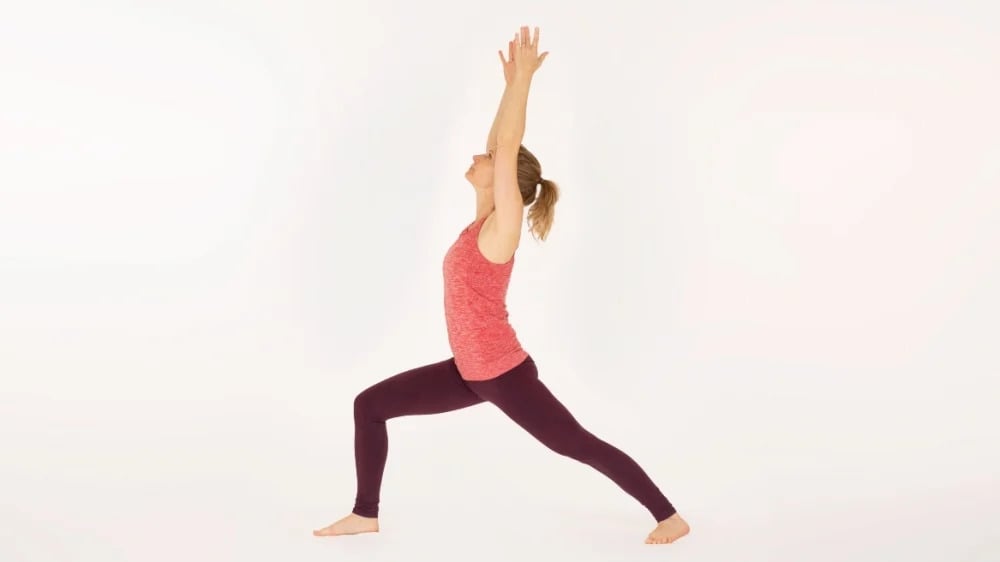
Virabhadrasana 1, also known as warrior pose 1, is one of the basic yoga poses that is practiced to manage sciatica.
How to do:
• Start by standing in the mountain pose and thereafter, move your feet apart to gain a gap of 3 feet between them.
• Raise your arms forward, keeping them parallel to each other and perpendicular to the floor.
• Turn your left foot to an angle of 45o and your right foot to an angle of 90o but ensure that both your heels are in alignment.
• Turn your torso to the right while squaring your pelvis and bend your right knee over your ankle.
• Reach up while pulling your ribcage away from your pelvis. Stretch as much as you can and hold the position for at least 10 seconds.
• Repeat the same on the other side.
Limitation: If you are suffering from hypertension, heart disease, shoulder issues, and neck pain, refrain from practicing this asana.
10. Virabhadrasana 3:
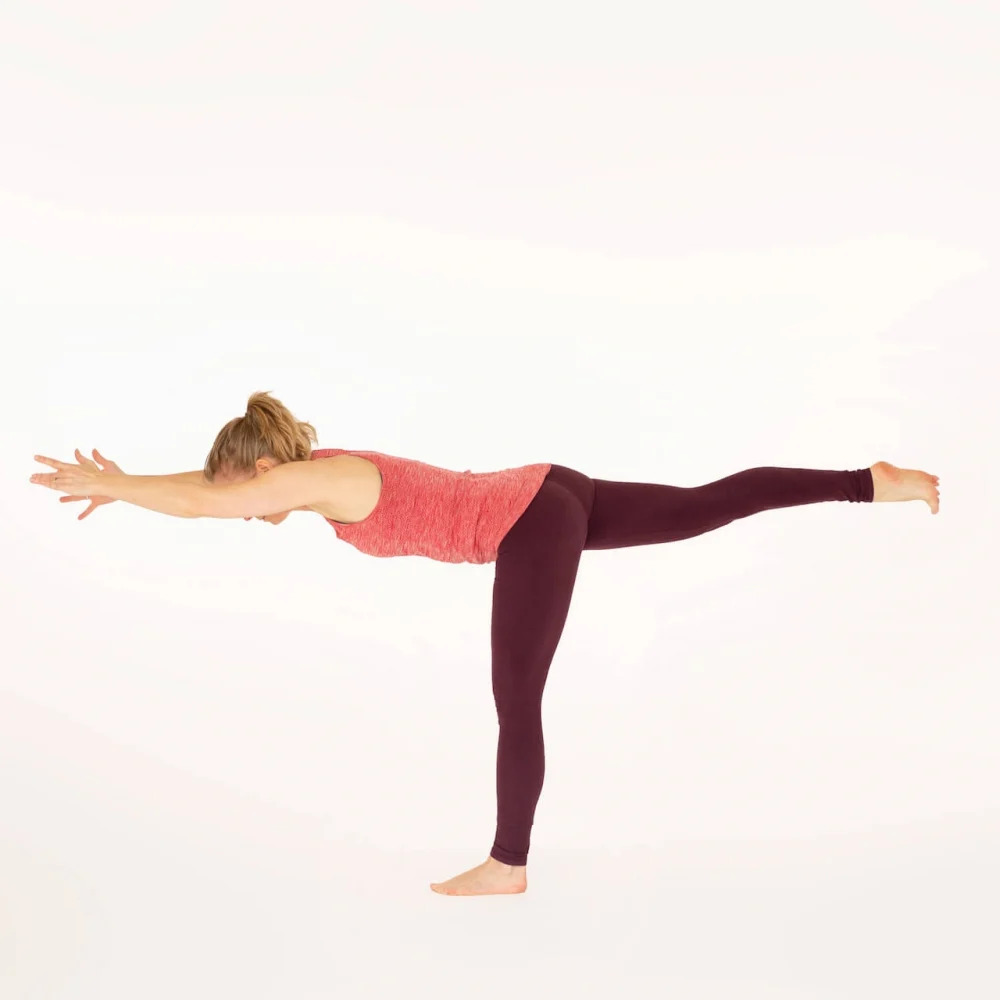
Virabhadrasana 3 is the pose of a warrior and is known to be effective to strengthen and tone your abdomen. It benefits also include improving your balance and posture in addition to burning fat in the hip and thigh areas.
How to do:
• Stand with your legs apart with a 4 feet gap between them. Bring your right foot forward.
• Bend your torso by putting your weight on your right foot.
• Raise your left leg backward till your thigh is parallel to the floor and your knee and heel are in alignment.
• Keep both your arms parallel to the floor while they are stretched forward.
• Hold this position for at least 10 seconds and bring down your raised leg to release.
Limitation: If you are suffering from hypertension, heart disease, pain in shoulder or neck, and knee pain, do not attempt this asana.
11. Ardha Chandrasana:

Ardha Chandrasana, also known as the half-moon pose, is practiced to derive many benefits including relief from back pain, osteoporosis, constipation, sciatica, menstrual pain, and anxiety, among others.
How to do:
• Begin by performing the extended triangle pose on your right side while your left hand is placed on your left hip.
• Bend your right knee and bring your right hand to the floor.
• Now, start straightening your right leg while slowly lifting the left leg off the floor.
• Ensure that your left leg is straight and parallel to the floor.
• Thereafter, reach your left arm straight up, ensuring that both your arms together form a straight line.
• Look up at your extended left arm and hold the position for at least 10 seconds.
Limitation: If you have any injury or pain in your knee, hip, shoulder, or back, do not try this asana.
12. Dhanurasana:
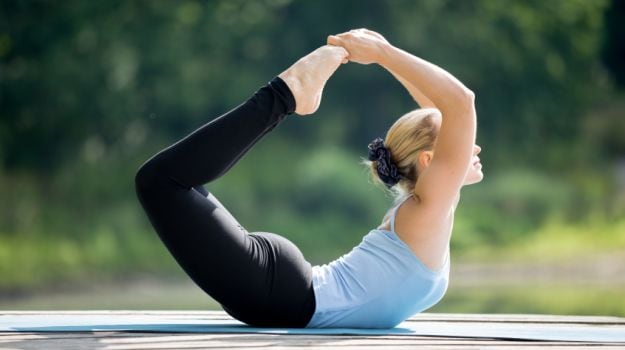
Dhanurasana, also known as bow posture, is practiced to derive benefits, including managing diabetes and burning accumulated fat around your belly, hip, and waist.
How to do:
• Lie down with your stomach to the ground and your back facing up.
• Slowly fold your legs backward by bending your knees.
• Extend your hands to grab your ankles or toes and pull up your ankles and thighs towards your raised torso and head.
• Look forward and hold this position for at least 10 seconds.
• To release, let go of your ankles or toes and bring yourself to the initial position. Inhale and exhale correctly through the asana.
Limitation: Do not practice this asana if you suffer from –
• Appendicitis
• Peptic ulcer
• Hypertension
• Hernia
• Slipped disc
• Spondylitis.
13. Setu Bandha Sarvangasana:
Setu Bandha Sarvangasana, also called the bridge pose, is known for its ability to stimulate your internal organs, calm your mind, improve digestion, manage asthma and sinusitis. It is also practiced by women who are exhibiting menopause symptoms.
How to do:
• Lie on your back with your arms by your sides and place a thick towel or blanket to protect your neck.
• Press the sole of your feet on the floor by bending your knees.
• While pressing the floor with your hands and feet, thrust your buttocks upwards while tightening it.
• Ensure that your thighs and your feet are parallel when your buttocks are lifted up.
• Lift your buttocks till your thigh is parallel to the floor.
• Let your fingers be intertwined and let them rest on the floor under your lift.
• Hold this position for at least 10 seconds and slowing bring yourself down to come back to the initial position.
Limitation: If you have a neck injury or are suffering from neck pain, do not practice this pose.
All the above-listed yoga asanas are effective to help your burn the fat accumulated in your hip and thighs areas. However, practicing all the 13 elaborated asanas may not be feasible in one sitting. Hence, we have come up with a list of 5 asanas that can be practiced diligently to witness the same results. The asanas are –
• Mandukasana
• Halasana
• Virabhadrasana 1
• Dhanurasana
• Setu Bandha Sarvangasana.

Conclusion:
It is a fact that shedding the stubborn fat in the hip and thighs region can be quite a challenge. However, yoga has proved itself time and over to be an effective weight-loss option. Practicing the listed asanas consistently alongside living a healthy lifestyle can help your burn the fat naturally and quickly. If you have run out of all options to gain a perfect waist and thighs, yoga is definitely worth a try!
Yoga is a natural weight loss option that has been effective in shedding fat in problem regions like hip and thighs. Practice yoga asanas to gain a perfect and healthy body.

