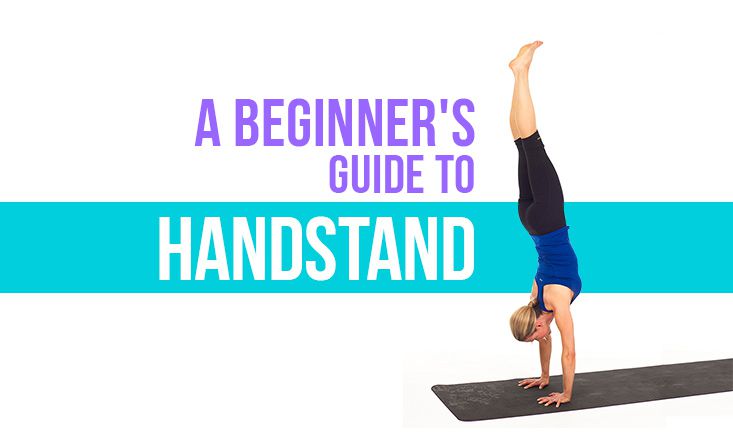
Have you always wanted to learn how to do a handstand? I know I have. But while I have a decent level of fitness as a runner, my skills are lacking in the balance and strength departments. In an effort to address this, I asked yoga teacher Brittany Szafran of Sass Yoga to teach me how to master this pose.
According to Szafran, pulling off a solid handstand is as much a mental feat as it is physical. There’s no set timeline for getting from point A to point B because everybody (and every body) is different. It may seem scary, but with a little practice and effort, you too could be pulling off this totally awesome move before you know it.
Getting started
According to Szafran, it’s important to focus on the main muscle groups you’ll need to get vertical. A handstand is a total body pose, so you’ll need to strengthen and lengthen your hands, wrists, arms, shoulders, back, chest, abdominals and obliques, quads, hip flexors, and inner thighs (adductors). Szafran recommends working through these exercises for as long as it takes for you to feel strong enough to progress to the next stage.
Plank: After you master the original pose, try variations such as planking on your forearms or alternating leg lifts while planking. Do 2-3 sets of each variation, working up to holding each pose for 60 seconds.
:max_bytes(150000):strip_icc():format(webp)/__opt__aboutcom__coeus__resources__content_migration__mnn__images__2017__07__downward-facing-dog-a16b843c7a584690b2c3ec55c48aa7cb.jpg)
Downward-Facing Dog: Start on your hands and knees with knees hip distance apart and toes curled under. Move your wrists from being directly under your shoulders and place your palms down on the ground about a foot forward. Keeping the arms straight, inhale to lift your knees off the earth and exhale to shift your sitz or sitting bones up and back into the air. Work towards straightening your knees and pressing you heels closer to the earth, but knees can be bent and heels can be lifted. What’s most important is keeping a long spine with the sitz bones and hips high and especially allowing your chest to press through your straightened arms back toward your thighs. Once you’ve mastered this move, you can vary it by peddling the feet (press one heel deep into the ground and bend the opposite knee, then switch.)
:max_bytes(150000):strip_icc():format(webp)/__opt__aboutcom__coeus__resources__content_migration__mnn__images__2017__07__plank-487d8cc852bf48238a120a6a7a6be5c4.jpg)
Plank/Downward-Facing Dog Combo: Pulse back and forth from Downward-Facing Dog to Plank. Keep your core engaged and let your breath guide the movement — inhale into plank and exhale into downward-facing dog. Do up to three sets of 10.
What’s next?
Now that you’ve built up some strength, you can start working toward your handstand by doing the following movements while keeping an emphasis on your breath. Szafran reminds us that you won’t be able to sustain the pose if you hold your breath. Also, work on distributing your weight evenly in the palms of your hands. Here are Szafran’s recommendations for exercises that will help you work your way to the top:
:max_bytes(150000):strip_icc():format(webp)/__opt__aboutcom__coeus__resources__content_migration__mnn__images__2017__07__half-handstand-hops-d167238ce876424f8ced17158a86c015.jpg)
Half-Handstand (against the wall): Start with both feet up against the wall (work on stacking hips, shoulders and wrists while engaging the core and pulling the lower ribs in toward your spine). Graduate to one foot against the wall and the other leg extended toward the ceiling. Handstand feet should “floint” or point. “Floint” means to extend through the ankle (like pointing) but with flexed back and spread toes.
:max_bytes(150000):strip_icc():format(webp)/__opt__aboutcom__coeus__resources__content_migration__mnn__images__2017__07__handstand-l-hops-a7751078311a4f60b916bc465e14d6c2.jpg)
Handstand L Hops (away from the wall): Start in downward dog and extend one leg into the air at hip height or higher. Use the other planted leg to mindfully push off the ground. Your extended leg should float directly overhead while your planted leg should rise only half way into the air (creating the “L” shape). Slowly work on floating your hips up and in line with your shoulders and wrists. After hopping up, come right back down onto the same planted leg — don’t switch your legs mid air (it causes instability). Do 2 sets of five L Hops on each leg.
Know how to fall
Szafran says that knowing how to mindfully fall out of a handstand as is necessary as learning how to hit one. The key, she says, is to protect your head and neck and don’t bend your arms. Slightly turn/twist off to one side, depending on which way you fall. If your legs fall over your head, keep your muscles engaged and palms pressing into the ground. Your arms will naturally bend as you fall into wheel before settling down onto your back. “Don’t let fear get in the way and cause your body to crumple,” said Szafran. “Stay aware, engaged and confident.”
:max_bytes(150000):strip_icc():format(webp)/__opt__aboutcom__coeus__resources__content_migration__mnn__images__2017__07__handstand-d3677785ce4641aba7719e23ca8a656b.jpg)
Hit a handstand
After you’ve worked on the above exercises and determined you’re mentally and physically ready to progress, take your Handstand L Hops to the next level by beginning to bring your planted leg overhead. Follow these steps to master the skill:
- Press deeply into the earth with your palms, spreading your fingertips wide to grip the ground.
- Engage your core by drawing your front low ribs in toward your spine.
- Engage your quads, draw your legs together, and lengthen all the way through your toes (pointing or flointing).
- Make sure your entire body is stacked — wrists, shoulders, hips, quads, legs.
- Making small, gentle movements; you might shift back and forth on your palms to find your sweet spot to equally distribute your weight.
- Start by keeping your gaze down at the ground. With practice, you can work towards looking forward in the direction your body is facing,
- Keep breathing and enjoy your new perspective!


